The Road to DDR5
Table of Contents
Introduction:
I don't need a new desktop. But just like turkey on Thanksgiving, DDR5 has forced its way in—inevitable, unavoidable. It's been a mentally taxing situation, but I decided to take it slow, spread the purchases over time, and carefully build an upgraded rig.
This article documents my transition to the AM5 platform, from initial thoughts to finalized hardware.
Setting Up a Plan
The goal was simple: a stable and future-proof system. I didn't want to jump on the absolute latest tech (such as the recently launched X890E chipset), but I still wanted a rig that would hold up for years. That's why I chose the X870E chipset, with DDR5 and PCIe 5.0 for long-term flexibility.
Key Requirements:
- ATX motherboard (to ensure at least three M.2 slots)
- 64GB DDR5 RAM
- No SATA storage, only M.2 drives
- Good airflow, skipping unnecessary HDD bays
Choosing the Components
After watching and reading quite a few items available on the web - youtubes from GamersNexus and JaysTwoCents among others - adding to that some forum and Discord conversations, I ended up with the following setup:
CPU: AMD Ryzen 5 7600X
I originally considered the Ryzen 9 7900X, but ultimately decided to cut costs slightly without sacrificing much performance. The 7600X still offers excellent speeds and efficiency. I will benefit more from a more all round performance since my games do not require that much.
Motherboard: Gigabyte X870E AORUS Elite WiFi 7
I debated between Asus, MSI, and Gigabyte for a while. Asus had some BIOS controversies, and MSI's Click BIOS interface received harsh criticism, so I landed on Gigabyte X870E—a well-balanced board with great PCIe and M.2 expansion options. I am not new to Gigabyte as brand, but I do think it may have been 8-9 years since my last hardware from them.
RAM: G.Skill Trident Z5 64GB DDR5-6000
I checked compatibility against the motherboard's QVL list before purchasing. This kit only comes with XMP profiles, but my motherboard should handle it without issue.
Storage: Samsung 990 Pro (Heatsink Version)
I went with two Samsung 990 Pro PCIe 4.0 NVMe drives, one of which I already had. However, I ran into a common issue: my motherboard also includes built-in M.2 heatsinks, leading to a conflict. Since removing the Samsung heatsinks voids the warranty, I had to make a choice.
The Samsung heatsinks would not fit attached to the drives in the M.2 space of the Motherboard. I decided to keep them drives thus removing the heatsinks. Probably not recommended, warranty voided.
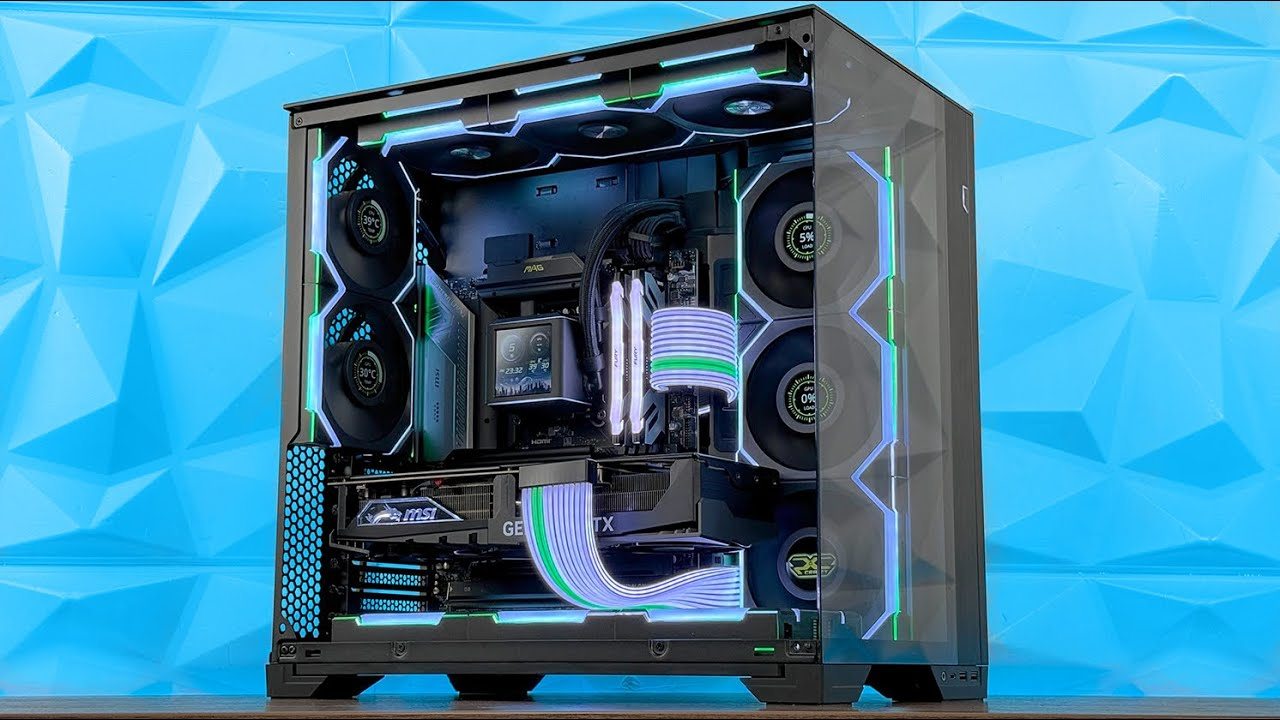
Case: Lian Li O11 Dynamic Razer Edition
After much deliberation (and countless YouTube reviews), I landed on this sleek RGB-friendly case. It fits ATX motherboards, has plenty of space for airflow, and pairs well with my Razer keyboard and mouse (which I got as a Christmas gift).
Cooling: Lian Li Galahad II Trinity SL-INF
Originally, I planned to use my Noctua NH-D15, but after realizing that my case only supports 155mm air coolers, I had to pivot to AIO liquid cooling. Lian Li's Galahad II matched both my budget and aesthetic.
Additionally, I grabbed a set of Lian Li UNI Fans TL to improve airflow and keep things looking clean.
Not replaced
I should mention that I do not replace my Corsair RM850 PSU nor my Radeon RX6750XT GPU.
Addressing Compatibility & RGB Control
A major concern was RGB software conflicts between:
- Gigabyte's RGB Fusion (for the motherboard)
- Lian Li's L-Connect 3 (for the case & fans)
- Razer Synapse (for my keyboard/mouse)
To simplify everything, I discovered SignalRGB, a third-party tool that syncs many brands items into a single software controller. We will see what works.
The Build!
With all parts in hand (or arriving within days), it's finally time to put everything together. The build will include:
- BIOS tuning
- RAM latency optimizations
- RGB synchronization
- Cable management (or a valiant attempt at it)
How smoothly will it go? Well… we'll see. Expect some loud cursing and misplaced screws. But once completed, this rig will be faster, cooler, and much quieter than my old AM4 system.
Dual Chamber Build
Unlike my previous builds, this case features a dual-chamber layout, which introduced a new dynamic to the building process. It turned out to be quite fiddly, constantly switching between the front and back, adjusting components in stages—push a bit, turn around, pull the rest. While the layout allows for a cleaner front view and better airflow, it also led to a few key realizations:
Case Width Matters More Than Expected
My Case selection (270mm wide) was not sufficient when it came to rear exhaust options and placing fans there. A slightly wider case would have allowed me to install a 120mm RGB exhaust fan in the upper-left CPU area, keeping it in line with the rest of my fans. In theory, two fans stacked vertically would have fit in a wider case—something to consider for future builds. As it stands, I left the space empty since the AIO's three top-mounted fans handle exhaust efficiently—so no real thermal concerns, so perhaps just an aesthetic limitation.
PSU Reuse & Modular Cabling Woes
My Corsair RM850 PSU had enough wattage, so I opted to reuse it. However, I ran into a common issue when switching platforms:
- The CPU 12V 8-pin cables from my previous AM4 build were not compatible with the new AM5 motherboard's power requirements.
- Modern PSUs often rearrange modular connectors, meaning even if the cables physically fit, the wiring layout can be different.
- I also needed two CPU 8-pin connectors instead of one, a detail worth double-checking before reusing an older PSU.
Fan & USB Header Management
With nine fans total, daisy chaining helped, but I still needed two fan hubs for proper power and control. The motherboard only had two USB headers, which wasn't enough after factoring in the AIO and other devices.
The solution? A USB header expansion hub, along with ensuring a SATA power cable with at least three connectors was available for everything.
Front Panel Minimalism – No Reset, No LEDs
One thing I quickly noticed—this case completely lacks traditional front panel headers beyond the power button. There's no reset button, no HDD LED, and even no power LED. The only available connections are USB 3.0, USB 3.2, and the power button.
This isn't necessarily a dealbreaker, but if you rely on a reset button for quick reboots or like having HDD activity and power LED indicators, they're simply not there. If these features matter to you, consider a case that includes them—or be prepared to remap your motherboard's reset switch to another function (such as RGB control or an external power button mod).
Word of Warning
- Dual-chamber cases may require extra patience. Space is not really tight, however expect constant repositioning to reach hidden connectors and routes.
- Check PSU modular cable compatibility. Even if the brand is the same, do not assume old cables work with a new platform.
- Plan USB headers in advance. Many AIOs, fan hubs, and accessories eat up motherboard headers—make sure you have enough or grab an expansion hub.
- Wider cases give better flexibility. If you plan on using rear exhaust fans, make sure your case isn't too narrow to fit the same model and type of fans you've selected for the rest of your build. In my case, I couldn't use matching RGB fans in the rear due to space limitations and am still pondering whether to place some obscure 80mm fans there or not...